Introduction

My name is Ignacio Flores (Candidate number: 9049) and I am working in Group 2 with Mario Louka, (Candidate Number 9099) and Eddie Rowe (Candidate Number 9147). To access my work, please click on the three labels on the right named A2 Research and Planning, A2 Construction and A2 Evaluation.

Group 2 Music Video

Digipak

Digipak:

Website

Link to the website:Link to the website:


Monday 21 December 2015

Construction Post 6: Website Post-Production

We used the "add" tool to place
everything on the website
I spent a lot of time editing the website during post-production, as Eddie was focusing on the edit and Mario was mostly working on the Flat Plan. We used the website creation tool Wix to make the website, and I feel that it was very useful as I had no knowledge on other forms of making a website such as using HTML.

At first we decided to create the basic pages on the website:
  • Home
  • News
  • Media (With Bio under it)
  • Store
  • Tour
  • Contact
We then added some basic content to it, such as relevant information on all of the pages and the appropriate icons for each page, such as social media widgets.

On the home page we had all of the things that seemed most important, this included a link to pre order the album, the music video, the song, a link to the tour page and a list of social media links.

On the news page I put some announcements for big events such as the music video's release. After having received feedback from our target audience, who felt the website was not interactive enough, we added in a competition and an announcement video, featuring our artist addressing his fans, giving them an update.

On the media page there were some social tools added, but since we hadn't set up the accounts yet they looked quite bare. This would later become one of the most interactive parts of the website. We added in a lot of different features after getting feedback from the audience saying that there was not enough on the website for them to engage with. We added in links for purchase opportunities, including tickets for Orlando's upcoming concerts, download links for digital copies of the single 'Sun Goes Down' and also a link to the store page for pre-ordering the album. There were also social media pages added into this page, we added in a widget for Orlando's instagram feed, which also prompted viewers to follow his account.

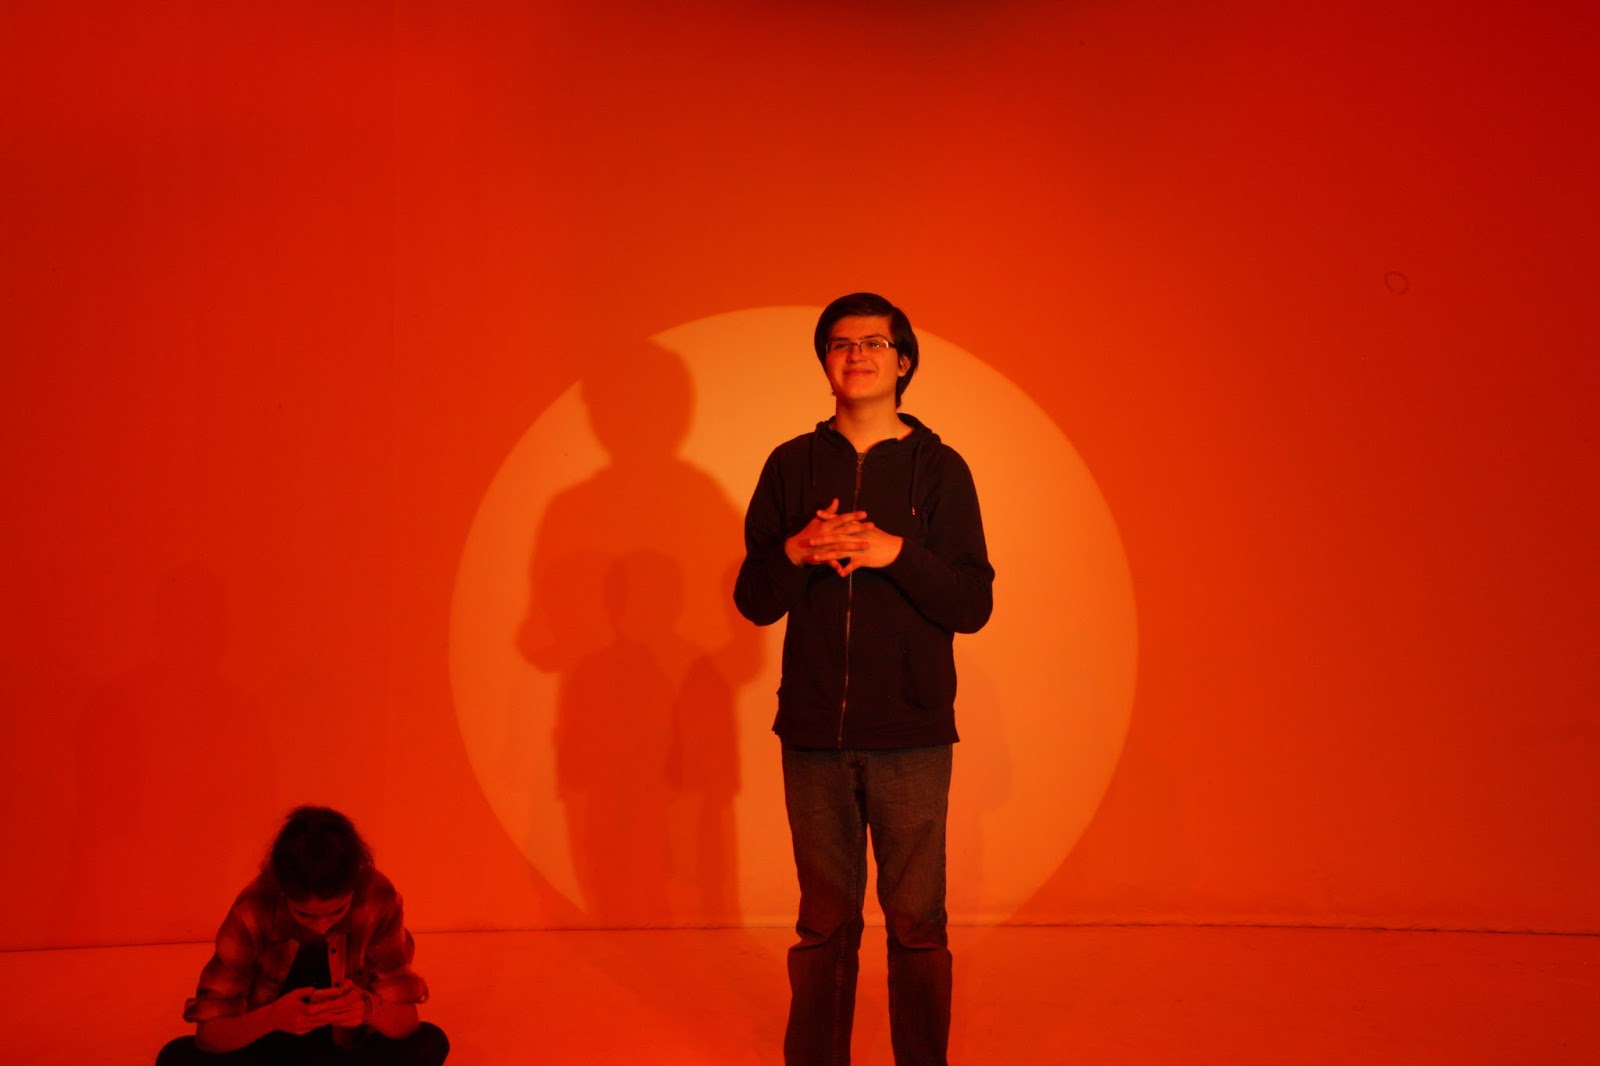
The bio page was set up with a space for Orlando's picture at first, since we had not done the photoshoot yet. There was also a section for text about Orlando, so the audience could learn more about him.

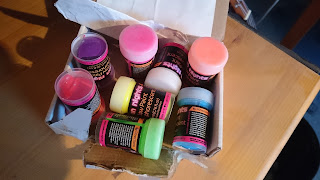
For the store page I inserted a store tool, but we did not have any products to put on there at the moment, apart from a pre-order page for the album. Later, this page would be populated with merchandise. To get a better sense of what our audience would buy, we carried out a survey and decided to display the most popular results on the store, with items such as t-shirts and mugs being the highest in demand. Using the website Redbubble.com, I created the designs which we then used to advertise the products on the store page.

The final version of the store page

The tour page had a list of dates and a link for people to buy tickets for the show, which would direct them to www.ticketmaster.co.uk
An early version of the Tour page
The contact page included some fake contact information for people who worked at our record label. This let people get into contact with them, while also making the website look legitimate and professional, since all other artists we looked at had contact information on their website..

Construction Post 5: Digipak Post-Production

For the album cover, we wanted to follow conventions. At first we looked at different album covers and quickly found common aspects among them. They usually only included a name, and sometimes an illustration. So, at first we included a stylised logo on the front of the album cover (we would use this logo in other products, such as the website for synergy) and the name of the album along with an interesting graphic. When we asked for feedback from our teachers, they said that they liked the logo however said that it looked a little bare. We explained that this is what the majority of albums were like, but they told us that the albums from last year had not had their artist on the front and lost marks for doing this. As a result of this, we decided to put a picture of Orlando on the front cover, and we embraced this new design as it gave our artist more of a presence.

The Orlando logo
For the back cover we put titles of songs that would be in the album. We also put in institutional information along the bottom, including copyright information, a link to the official website, a QR code, a barcode and the logo of the record label. This part of the album stayed largely unchanged, as nobody had any criticisms of it, however we did change the colour of the background to match the front.

On the front cover Orlando is portrayed as a loose and laid back character, for instance his appearance looks casual; he is wearing a shirt and pair of sun glasses. the sunglasses also blocks the audience from making contact which could portrays him to seem cool and relaxed and also less serious which people may find quite interesting. The kind of messy, creative looking font used for his name reflects this.

For the inside we originally had it blank in the same colour as the front as we did not know what to do. However, after receiving some audience feedback we decided that we should add in pictures, so that it did not look bland. We referred back to the original plan we had made for the album cover and decided to insert an image of Orlando on one side, and I had the idea of putting the vinyl disk on the other.
The original flat plan for the album cover
How the inside cover ended up.

Construction Post 4: Music Video Post-Production

For the post-production, we used different software to create the final product. Adobe Premiere Pro was used in the editing of the video and Adobe After Effects was used to add in extra things to the video, such as the backgrounds.

Adobe Premiere Pro

Getting the edit done was a big priority for us, since we knew that most of our time would have to be spent in After Effects. First, we uploaded all of the footage onto Premiere Pro and we named the video clips according to which shot number they were and which take it was. This helped us when it came to placing the clips onto the timeline. We created several tracks and then layered the takes onto the timeline. By having different layers, we were able to add in newer footage by placing it on a higher track. Some simple effects were done in Premiere such as reversing the the footage slightly then playing it normally, this added some diversity to the video. The video was mostly cut to fit with our original storyboard, however some sections were changed after we received audience feedback. For example, we were influenced by audience feedback to change the glow in the dark scene so that it cut to the beat, making it more engaging.

What the timeline looked like in Premiere


Adobe After Effects

When the edit of the video was done, we began work on adding in the backgrounds and objects into the scenes by using Adobe After Effects, we also used the software to grade our shots while we worked on them, rather than grading them in Premiere later. During the editing in After Effects, a lot was done to alter the footage. The first step of this involved removing the green backgrounds and also making sure that the skin of the characters didn't have the green tone from the light that was reflected off of the green screen. Then we added in the effects we wanted, which varied from scene to scene. For example, in the yellow scene, the yellow background had to be added, then a new layer had to be added and cut in the shape of a ball. Then, in addition to changing the way the ball itself looked, a glow around the ball was added. Then the ball had to be given a motion path, which we had to make match the motions of the main character, to make it look like as though she was pushing the ball away. This was a time consuming process, since each shot had to be meticulously worked on. Below, you can see the final result of what the ball looks like.


For the editing and grading, we used a tool that was in the programme called Luma, which allowed us to change the contrast and saturation of the scenes. This was very helpful for us, because of the importance the colours had in our music videos it was vital that we were able to get the backgrounds to be the desired colours. This also was quite important for the contrast between the first scene, which was meant to look dull and dreary compared to the following dream worlds.

comparison between the first scene with a later one

After Effects was essential in our music video, as we relied heavily on the chroma key technology to make our music video look the way it did. However, there were some cons to using the software. There were extremely long opening and rendering times which cut into the available time we had to work on the project. Because of the size of the project on more than one occasion the programme crashed, meaning that we lost some progress.

Construction Post 3: Production - Photo Shoots

After having finished the shoot for the music video, it was now time for us to shoot photos for use on the album cover and website. We had three days during the week to get through the shots we needed, but we ended up not needing the last day.

25th November

At first the lighting caused an issue with the way the photos were turning out, but after modifications to the camera's settings the photos turned out fine. Everything went to plan, and we were able to take the photos we wanted.

Before adjusting the light settings
After the adjustments


26th November

On the Thursday, we encountered some technical difficulties. There was an issue with the flash due to one of the plugs having broken, so we were not able to get as much light as we wanted in the shots. The backgrounds were the areas that most obviously looked darker than the photos from the day before, but this didn't really matter since we would be editing out the backgrounds in Photoshop later. This day was also used to get photos that included both Mario and Eddie which would be used for the website.
There was significantly darker lighting on this shoot

We wanted these photos to more properly convey their personalities, so we had a range of different shots including some that were more fun, and some where they seemed more serious and cool-looking. We also decided to get some shots that just featured Eddie, in case we needed to use them at some point. At the end of the day we had decided that the past two days had gone so well that we did not need to use the third day for shooting.

Construction Post 2: Music Video Production Part 2

In the latter part of the week we had performance shots and the big group scenes planned, so this was going to be very time consuming and important for us.

Day 4 - 18th November

On this day, we chose to film our performance shots, as Shayam would not be there since she had other commitments.  For this, we chose to film Mario singing the song from different angles, we planned to use these shots as cutaway footage during the group scenes. They were also useful as after showing the rough edit to some people in our target audience, quite a few of them said that we should have had more close ups of the artist. The filming process went quite smoothly as we used Eddie's 600d camera as well as the school's 5d camera to film from different angles at the same time, speeding things up.

600d and 5d footage was taken at the same time

Day 5 - 19th November

This day was the most intensive shoot for the group. On this day we had the orange, purple and black scenes planned, which all involved large groups of actors. We shot the glow in the dark scene during lunch, as this was when we could get the most actors on set. We initially planned to use UV paint, however when we tested it, it didn't show up well on camera. Instead, we made the main focal point of the scene the glow sticks. This worked out well, since we had enough to make sure everyone was adequately decorated and to create a visually interesting scene.


We then used the time during our media lesson to shoot the new year's (purple) scene, we used people from our media class and others who were free at the time to fill the scene. We had to get quite a lot of different shots in this scene, so we overran a bit, but this wasn't a major problem. We were able to get a variety of shots, some which we thought of in the heat of the moment.

After school, we then shifted our focus to the party (orange) scene. We chose to include a lot more people in this scene, because after showing the rough edit to our target audience focus group, many people said the scene felt empty, with not enough going on. We managed to get all of the necessary footage, finishing on time. However, there were some scenes in which we could have some more alternative shots, so we might be able to benefit from one more shoot.

Day 6 - 20th November

On the final day of our shoot week, it was a lot less rigorous, since we used the day to re-shoot footage we thought could have been done better. Using the morning to go over the footage, we used the time we had at lunch to re-shoot, which didn't take very long. Below is the type of shot we were getting on the day, it was just a few shots that involved Shayam.

Construction Post 1: Music Video Production Part 1

We had six days to shoot all of the footage we needed. The main focus of the first three days was to get the individual shots for Shayam, Mario and Eddie, who played the main characters. We would also be able to get more artistic shots if there were actors that were unavailable for certain slots.

Day 1 - 15th November

The call time for the first day was 9 a.m. and we were to start shooting at 11 a.m. The reason we arrived so much earlier than the shoot time was so that the actors could get into their costumes, to prepare the set and also give the technician time to set up the greenscreen for us. The first shoot day went very well and we were able to work very efficiently, because of this we had more time than we anticipated to film additional shots, which meant that we would have a lot of shots to choose from when it came to editing.

Day 2 - 16th November

On this day, we decided to shoot the shots for the red, 'Mars' scene. The shoot went well and we didn't encounter many problems. One issue that came up was when Shayam had to place down a flag. We used a mop as a guide for the flag pole, which we would then later remove in post-production. At first, we noticed that when she was holding the mop at an angle when placing it, so we got Mario to hold it upright.


Day 3 - 17th November

We chose to use this day to get footage that we had missed or needed to re-shoot. One of the things we decided to re-shoot were some of the shots with Shayam from day 1. This is because while reviewing the footage, we noticed that there was an error in the costumes - she bare foot in these shots, so we filmed these shots again with her wearing socks. We felt this was something that we should have fixed to avoid continuity errors in the final video.
The costume error was fixed

R+P Post 33: Reflections on my role and contribution during Research and Planning

I think that our project has been progressing well so far, and I feel that as a group, we have been working together very well.

During the research period of the project, I was the one who had the least knowledge on the genre, although Mario and Eddie seemed very keen on it. As such, I took it upon myself to research popular artists and their music so I could have a wider understanding of the conventions of the artists and music videos of the genre, this also allowed me to take part in the discussion of ideas for the video as well as our artist's identity.

The shootboard I made
I think that the planning process has gone smoothly, since we all divided different tasks among ourselves to ensure that everything got done. I made the shoot board for the shoots, which proved to be very useful and time saving when the time came to use them.

R+P Post 32: Test shoot and rough edit

Like with the rehearsal shoots, we organised a schedule with the other groups based on when we were all available. Our group (Group 2) was scheduled to film on Tuesday and Thursday. We ended up having less time than the other groups as we had to set up the green screen for almost all of our shots.

We could only use a basic green screen during the test shoot since the other groups also had to use the studio for their shoots, this meant that we couldn't really get very good footage for long shots as we simply did not have the space. We did what we could but we were not able to get all of the shots we needed to complete the rough edit. We had some issues during the shoot such as floor lamps blowing and some of the lights on the lighting rig getting stuck on wrong colour settings. Furthermore, we were unable to add in the backgrounds in after effects, since by the time we were finished with the rough edit, we had to prioritise the planning of the real shoot.

The main issue we had was that of the small greenscreen, which hopefully will not be so bad in the real shoot as we will have a whole week to film. The problem of the technology failing us also impacted the footage we were able to get, we should probably leave some time in future shoots for this sort of situation, so that we can work around it. Finally, we realised while looking over the test footage that our scenes looked quite barren. This could be due to the fact that we had to use the small green screen, or that we did not have time to edit in the backgrounds, but it was still something that we had to take into consideration when filming in future.


R+P Post 31: My call sheet

We made a call sheet for the real shoot, this would let the cast and crew know the exact dates and location for the shoot. We listed the minor health and safety risks present on the set, so that no accidents would occur. It was useful in that it ensured that we all had each others phone numbers when it came to the shoot.
The call sheet

R+P Post 30: My shoot-board

For the main shoot, we produced a shootboard. This will help make sure that we are organised when it comes to the shoot, and will help us efficiently get through the shots we must do.
A page of our shoot board
We have the shot number in the first column, the shots are ordered in a way so that shots that require similar set ups can be shot closely together, saving time for our actors and for us. 
The time column is there so that we have a rough idea on how much time we should be spending on each shot, so that we stay on track for finishing on time. 
The shot image column is where we will put the post-it notes from our storyboard so that we can visualise what the shot is meant to look like. The description column next to it also facilitates this, but with added detail, such as the dialogue in the shot, and what needs to be done with the camera.
The actor/prop column lists who and what is needed for the shot.
The Director/Camera Op/Sound column is where we will write who carried out which role for the shot.
The Takes column is where we will tick off how many takes we have taken of the shot, and in the column next to it we will indicate which take we thought looked the best.

R+P Post 29: Rehearsals

The schedule for the rehearsal week
We arranged a meeting with the other groups in our class to decide who would use the studio when. This was based on how convenient which times were for each group, based on when we had free periods/lessons. Our rehearsal shoots will be on Monday, Wednesday and Friday. This is useful because we will be able to use the days in between our shoots to watch over the footage we get and then change our plans accordingly for other rehearsals.

In some of the slots on the sheet, some of the members of the group were not free, so we marked them with letters to indicate who would bee able to be there (E= Eddie, I= Iggy, M=Mario).

The glow-in-the-dark paints
We used rehearsals to try out various ideas we had. One of the first things we tested was the glow in the dark paint we had bought for the shoot. We wanted to see if it showed up well on camera, and when we realised that it did not work effectively, we decided to shift the main focus of the pitch black scene to the glow sticks.


Testing the lighting
We spent a large portion of our time in the studio trying to get the lighting to look right. We wanted to make the backgrounds different colours, we initially thought that this would be a simple procedure however in practice it turned out to be a lot more complex. The coloured light went onto our actors, which made them look very weird. We tried sorting this out with white balancing, but it did not work and in the end we decided to use greenscreen for backgrounds instead, this worked out well since it allowed us more creativity in the creation of our backgrounds, helping us make the video more dreamlike and surreal.


R+P Post 28: My kit list

My Kit List:

Camera:
•Canon 5D Mark II camera
•Canon 600D camera
•A variety of lenses (50mm, 24-105mm)
•Tripod
•Dolly
•Batteries
•2 SD cards


Studio:
•TV monitor
•HDMI cable
•Green Screen Cyclorama
•Floor lamps (ARRI lights)
•Lighting Rig
•Lighting Desk


Lectern With:
•MacBook Pro
•Studio sound system
•Control tablet

A picture of the studio

During the shoot we will be switching between the 5D camera given to us by the media department and Eddie's 600D, which is better for close ups. We will use the two cameras to our advantage, filming some scenes with both cameras at the same time, this will save us time when shooting and will also give us more choice in footage when it comes to the edit.


The lighting desk is also going to be extremely useful for us. If we choose to go with our original idea of changing the colours of the background for each scene, we can save lighting setups and quickly change between them, making our filming much easier to set up. On the other hand, if we choose to use green screen for most of our music video, we can use the lighting rig to get the right amount of light on the set.

The Leapfrog lighting desk

R+P Post 27: Casting

Mario on the right
and Eddie on the left
For Orlando and DJ Ed-E, we decided to use people from our media group. We thought this would be the best option because we already had a clear vision of what we wanted in the music video and would be able to carry these ideas out. Mario would be playing Orlando, and Eddie would be playing the DJ.

For the role of the child, we wanted someone who clearly looked young, the gender did not matter, since we found there wasn't really a gender bias in our primary audience of EDM fans. We first thought of using our friend Arian to play the role of the child; he looks fairly young and is taking drama for A-Level, meaning he would be able to act well in our video. However, when we discussed the times for our shoot with him, we found out that he would have to be attending rehearsals for the school play, which meant that we had to find someone else to play the child.

Shayam
We then decided that we should use Shayam from our media class instead. She also fit the role of the child very well. She had the same free periods as Eddie, which in addition to the periods in which we had media means that we would have a lot of time to shoot with her. Furthermore, the fact that she was also doing media means that she will have a good understanding of what we are trying to do with different shots when we direct her.


For the crowd of dancers, we have decided to use people from our media class, we plan to shoot during a lesson, since they would all be available at this time. Since we are not going to have an established dance routine, it is okay if the dancers don't have any training in dancing.
One of our extras

R+P Post 26: Set design, locations, and props

Since we had chosen to film to film our entire music video using a greenscreen, we did not have to worry about what most of the set looked like. This allowed us to only use one lighting setup on the lighting desk for the most of the video, we just had to ensure that the greenscreen looked even and that there were no shadows.

The list of props
Our main concern in regards to the set was managing the props which appear throughout the video. We first outlined all of the props that we would need for each scene and made a list. By making sure we had a list of props, it helped us stay organised for the shoots. It also helped us when we were in the stage of purchasing the props themselves, as we could cross off things which we had bought from the list.

Props that Mario has bought
Some props, such as the things used in the party scene had to be purchased, this was done online via amazon, although Mario did buy things like confetti and balloons from a specialised party shop.
Props such as the DJ kit and the microphone stand were luckily provided to us by the media department.

Mario and I testing out the glow sticks 
At the end of our video, we are planning on having a pitch black scene, which would involve the glow sticks. To make sure that they worked, we tested them out beforehand to make sure they showed up well on camera.

R+P Post 25: Costumes, props, and make-up

In preparation for the shoots, we came up with lists for costumes, props and make up.

Costumes
This list was divided for the different characters we had; The protagonist, Orlando, DJ Ed-E and the dancers.

  • Protagonist - White tank top, pink trousers, socks.
  • Orlando - Black shirt, black trousers, black shoes, ray-ban sunglasses.
  • Ed-E - Graphic t-shirt, jeans, black shoes
  • Dancers - We told the people to bring in their own clothes that they thought would be appropriate.


Props
To list the props we went through our setups and wrote down what we would need on a list as we thought of them.


  • Desk+chair for bedroom scene
  • Microphone stand + mic (for performance shots)
  • Desk for DJ equipment (possibly same desk as the one used in bedroom scene?)
  • DJ equipment (this and other DJ related items for performance shots)
  • Headphones for DJ
  • Face Paints (For the UV scene)
  • Glow Sticks (For the UV scene)

R+P Post 24: Planning my digipak panels

For the album cover, we wanted to follow conventions. At first we looked at different album covers and quickly found common aspects among them. They usually only included a name, and sometimes an illustration. We were thinking of including the artist name and the name of the album featured prominently along with an interesting background.

The original flat plan for our album cover
When we asked for feedback from our teachers, they said that they liked the logo placement, however they also said that it looked a little bare. We explained that this is what the majority of albums were like, but they told us that the albums from last year had not had their artist on the front and lost marks for doing this. As a result of this, we decided to put a picture of Orlando on the front cover, and we ended up embracing this new design as it gave our artist more of a presence.

For the back cover we will put titles of songs that would be in the album. We will also include institutional information along the bottom, including copyright information, a link to the official website, a QR code, a bar code and the logo of the record label. The colour of the back cover would be the same as the front. This part of the album stayed largely unchanged, as nobody had any criticisms of it.

For the inside we originally designed it to be blank (with the same kind of background as the front and back) in the same colour as the front as we did not know what to do. We thought we could possibly include a photo of our artist on one side and leave the side where the disk would be blank. When we got feedback, we were told that we had to include something on the disk side. I then thought we could put the same kind of vinyl disk that we had planned to put in Orlando's logo, which the rest of the group agreed would be suitable.
We chose to use a similar vinyl disk in our album

R+P Post 23: Planning my web pages

We first planned to plan the website's layout on paper, but then decided it would be better if we did it on Microsoft Powerpoint instead. By using powerpoint instead of drawing it out, we saved a lot of time.  By using the software we were able to quickly create shapes and icons and place them on different pages also allowed us to easily make changes, in case we decided we wanted to alter the way it looked.

We decided to use a navigation bar because we found that many other artists had it on their website and it seemed like an easy way to use the website, without cluttering part of it with a bar along the top. Calvin Harris' website (shown on the right), used it as well and we decided we would model the one on our website after his.

The pages that were made were loosely based on other websites we had researched, since they all seemed to follow a set of conventions. We included the following pages:

  • Tour
  • Gallery
  • Store
  • About
  • Freespace

The pages on Afrojack's website
The pages on Glowinthedark's website
The tour page would inform fans where and when Orlando will be performing, and will allow them to purchase tickets for these events.
    The gallery page will show photos of Orlando,     from official events and from 'behind the               scenes'. We may choose to have an instagram                                                                                          feed displayed.
The store page will allow fans to buy official branded merchandise, which will probably have the Orlando logo or be related to Orlando in some way.
The about page will have a short biography of Orlando's life to give fans a sense of who he is, and to give him some personality that would not otherwise come across to the audience.
The freespace page was inspired by what I had seen on the website for the band Daughter, which had only just been made when I saw it. I thought it would be a good inclusion, as it would keep fans checking back to see if more has been added to the page.

Along the bottom of the website, there will be a list of social media links which will be shown on every page.

R+P Post 22: Planning my promo shots

We wanted a range of different promo shots, this included long shots, mid shots and close ups. We also wanted to have Orlando in different poses, which would be typical of an artist in his genre. Since he is a singer, we did not want him to be in poses that would be more conventional for DJs in the genre, so we instead included shots such as him singing into the microphone, which would be more suited to him.

The following are some artists which we chose to draw inspiration from:
Disclosure

Martin Garrix

Calvin Harris

R+P Post 21: My key shots storyboard


We broke down our ideas into specific key shots for each section of our video. We did this by drawing out shots onto post it notes and sticking them onto a large piece of paper. We colour-coded the shots we had according to their framing and we used arrows on the shots to denote movement or panning.

We tried to include a variety of different shot types, as well as including a mixture of performance shots along with narrative shots.